Spark Tutorial (Part 2) - Jupyter Integration
Extending the Toolchain: Connecting Jupyter

Introduction
Before You Begin
Version Reference
| Software | Version |
|---|---|
| Virtual Machine | 7.1.4 (or later) |
| Redhat ISO | 9.8 |
| Java openjdk | 17.0 |
| Spark | 4.2.0 |
| Python3 | 3.11 |
Checking Package Versions and Setting Up pip
-
Upgrade the system’s default Python version (the built-in version can’t support the compute requirements of Spark 4.2.0, so an upgrade is required):
1
2
sudo dnf install -y python3.11 python3.11-devel sudo alternatives --install /usr/bin/python3 python3 /usr/bin/python3.11 1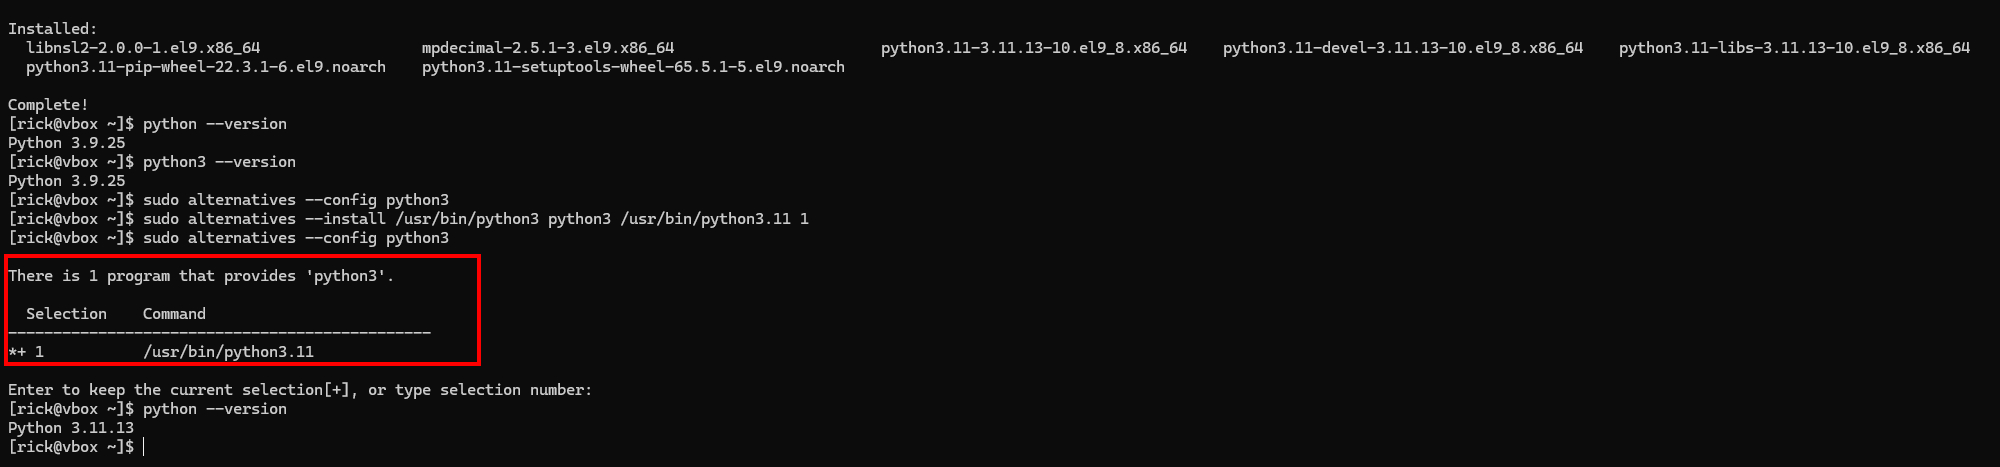
-
Check the installed version:
1python3 --version # Python 3.11.13 -
Install the pip package manager:
1sudo dnf install python3-pip # enter y to confirm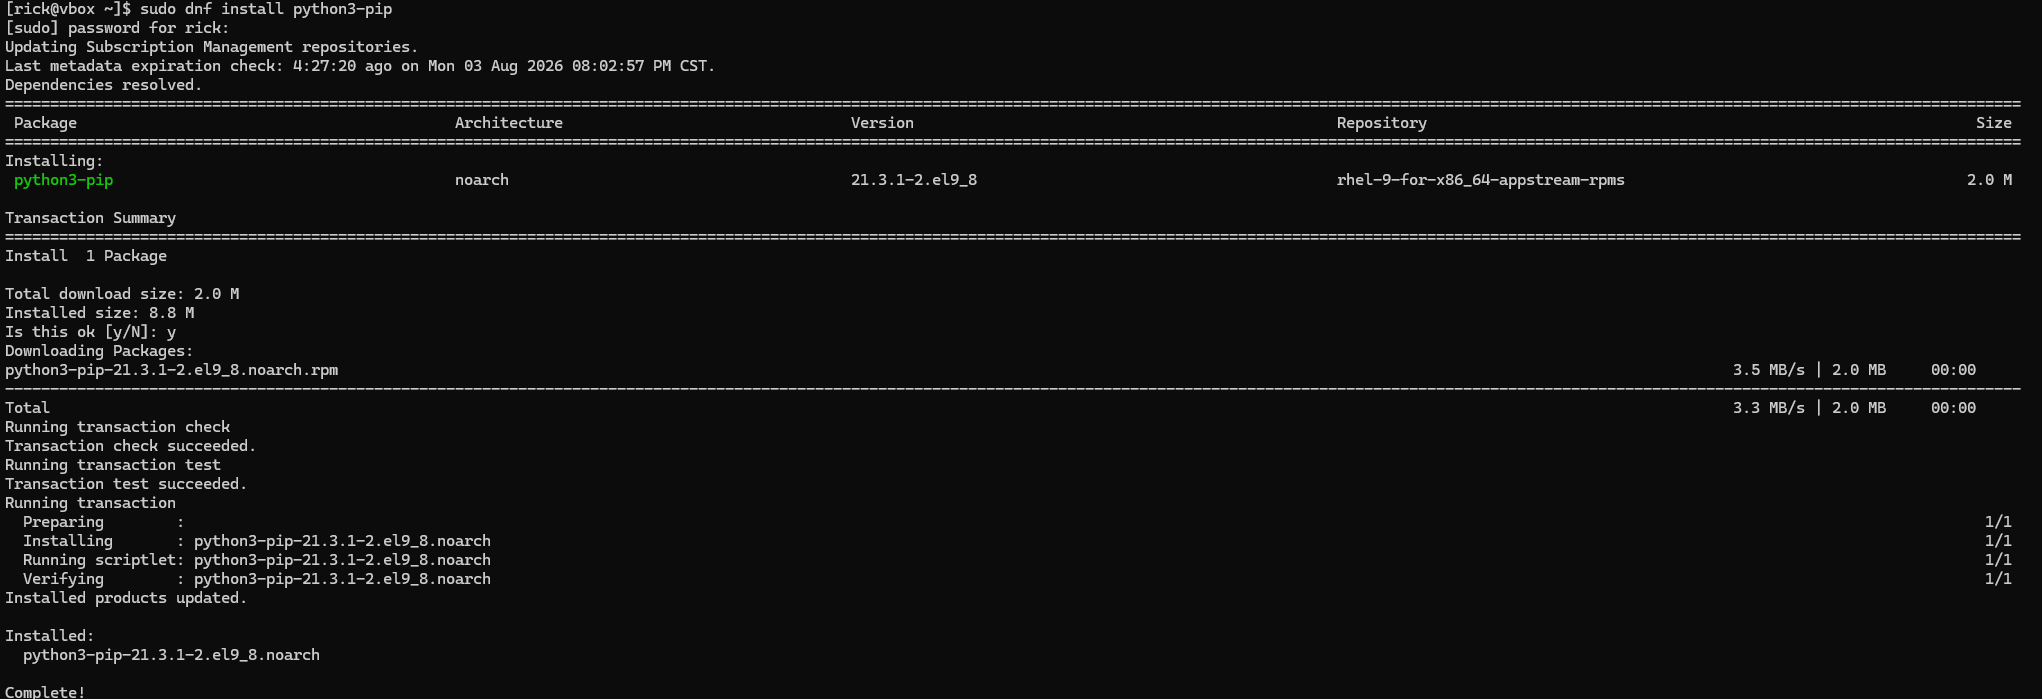
Creating a Virtual Environment (venv)
-
Create the virtual environment:
1python3 -m venv .venv # creates a hidden .venv folder in the current directory -
Activate it:
1source .venv/bin/activateOnce activated, you’ll see
(.venv)prefixed to the latest line in your terminal.
At this point, the virtual environment is ready — next, let’s install PySpark and Jupyter-Lab.
Installing PySpark and Jupyter-Lab
-
Install the core packages:
1
2
pip install pyspark pip install jupyter-lab # lighter-weight than the full jupyter package -
Generate a Jupyter-Lab config file for external connections (watch your indentation here):
1jupyter server --generate-config # by default creates ~/.jupyter/jupyter_server_config.py -
Open the config file at
~/.jupyter/jupyter_server_config.pyand set it to listen for external connections:1 2c.ServerApp.ip = '0.0.0.0' # listen on all interfaces c.ServerApp.allow_remote_access = True # allow remote accessWarningThis setting effectively opens Jupyter up to the outside network. It's fine if you're only running this on an internal network or a personal test machine, but if the box has a public IP, make sure you keep Jupyter's built-in token authentication enabled (don't turn it off manually), and consider restricting access by source IP through the firewall. Leaving this wide open — letting anyone connect in and execute code — is a surprisingly common security hole in real-world setups. -
Set the environment variable:
1 2 3vim ~/.bashrc # save and exit with :wq export PYSPARK_DRIVER_PYTHON=jupyter-lab source ~/.bashrc # reload -
Open up the firewall:
1
2
sudo firewall-cmd --add-port=8888/tcp --permanent # use --permanent based on your situation sudo firewall-cmd --reload
Starting the Service
-
Launch it:
1pyspark # copy the returned URL and token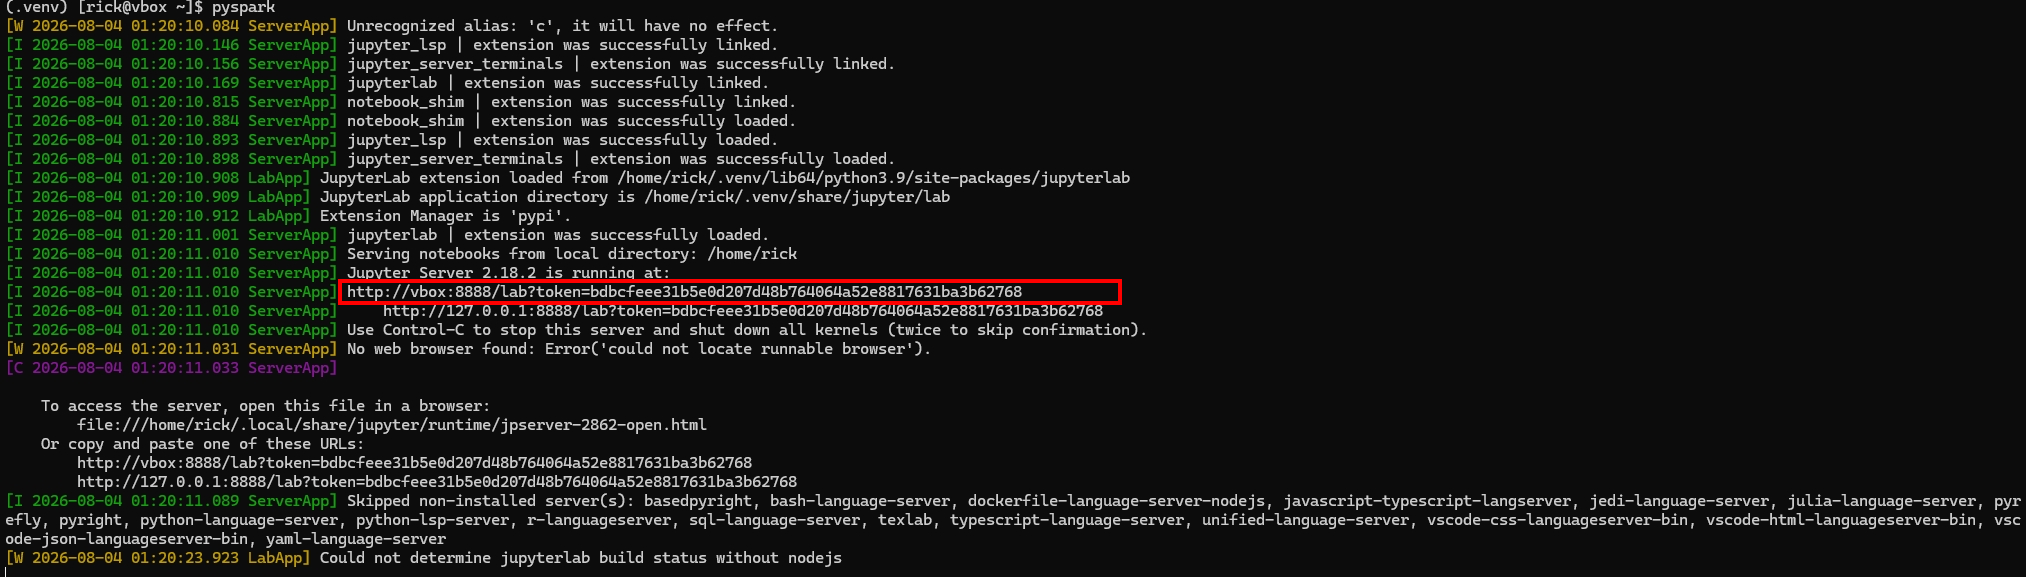
-
Replace
localhost(or127.0.0.1) in the returned URL with the host’s actual IP address, then paste it into your browser.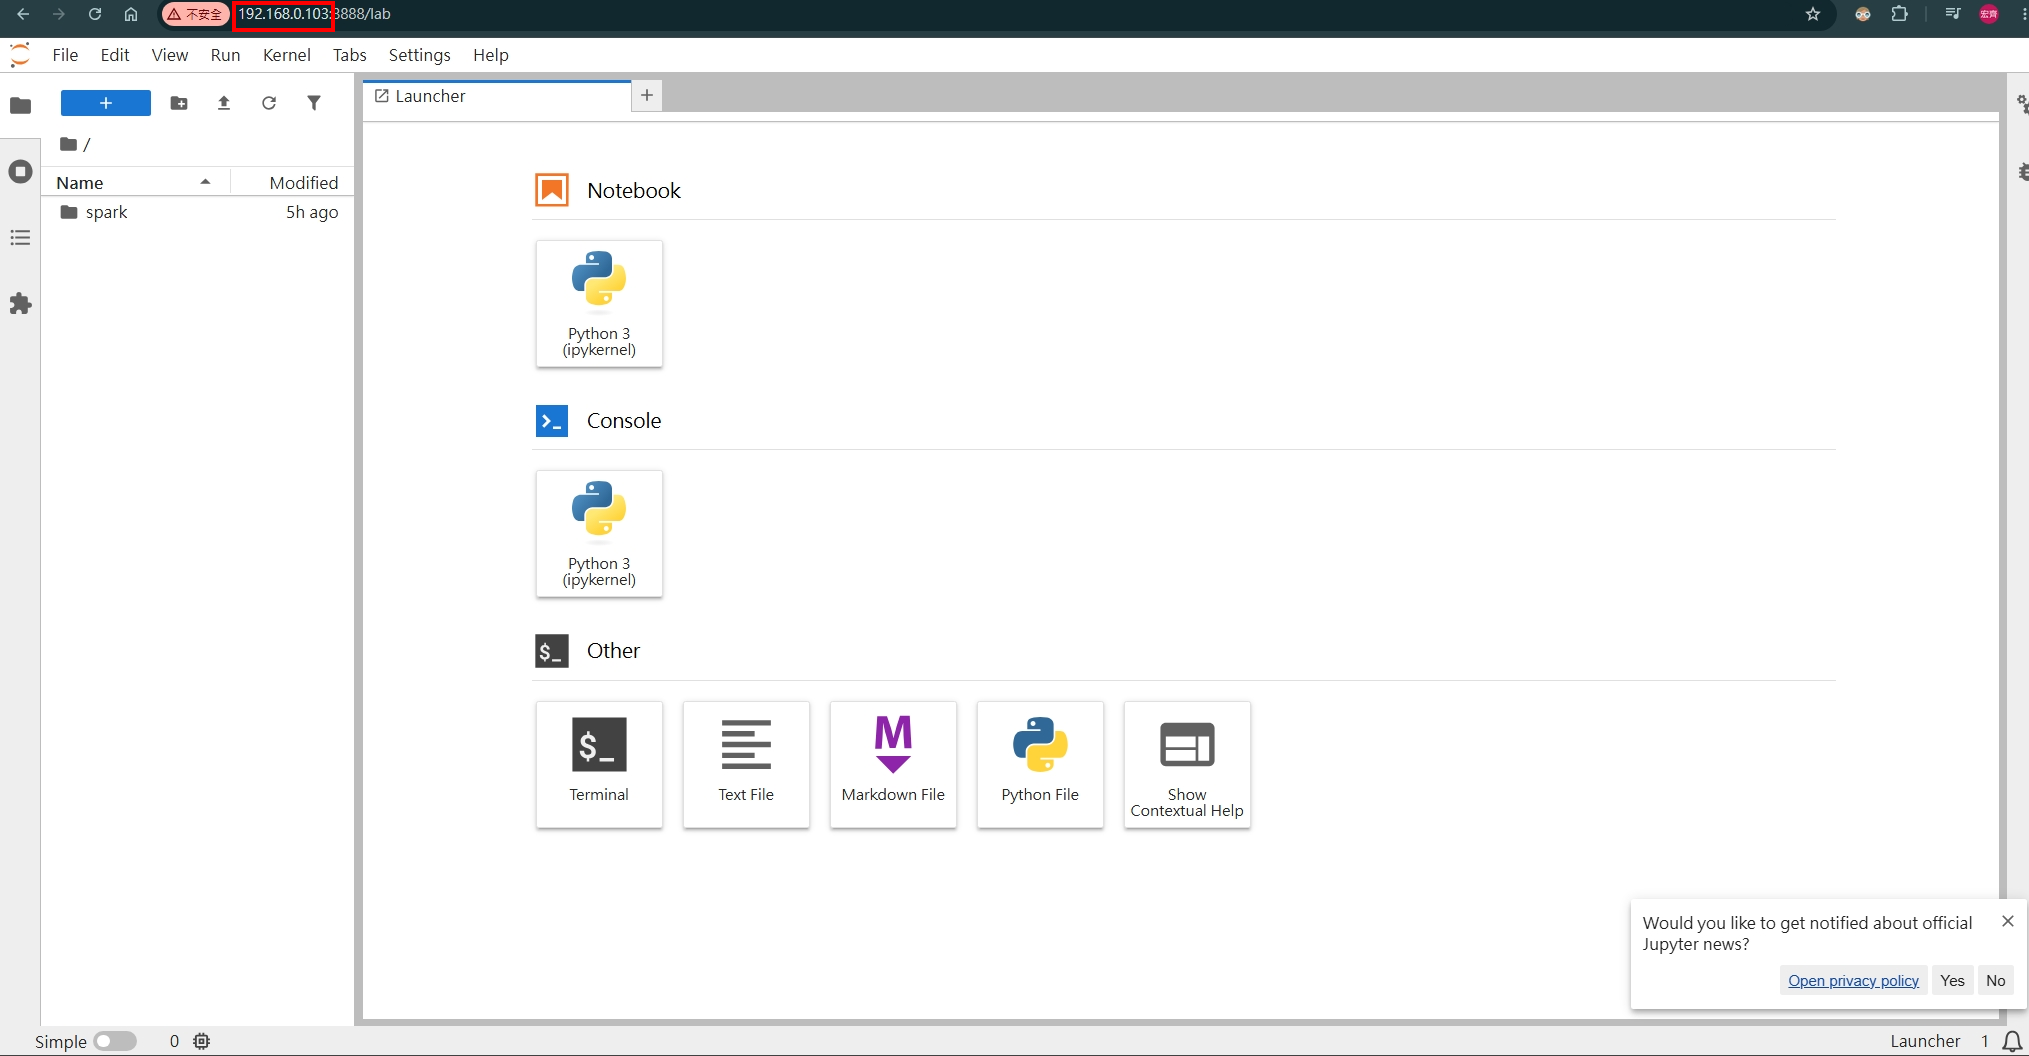
Testing the Connection
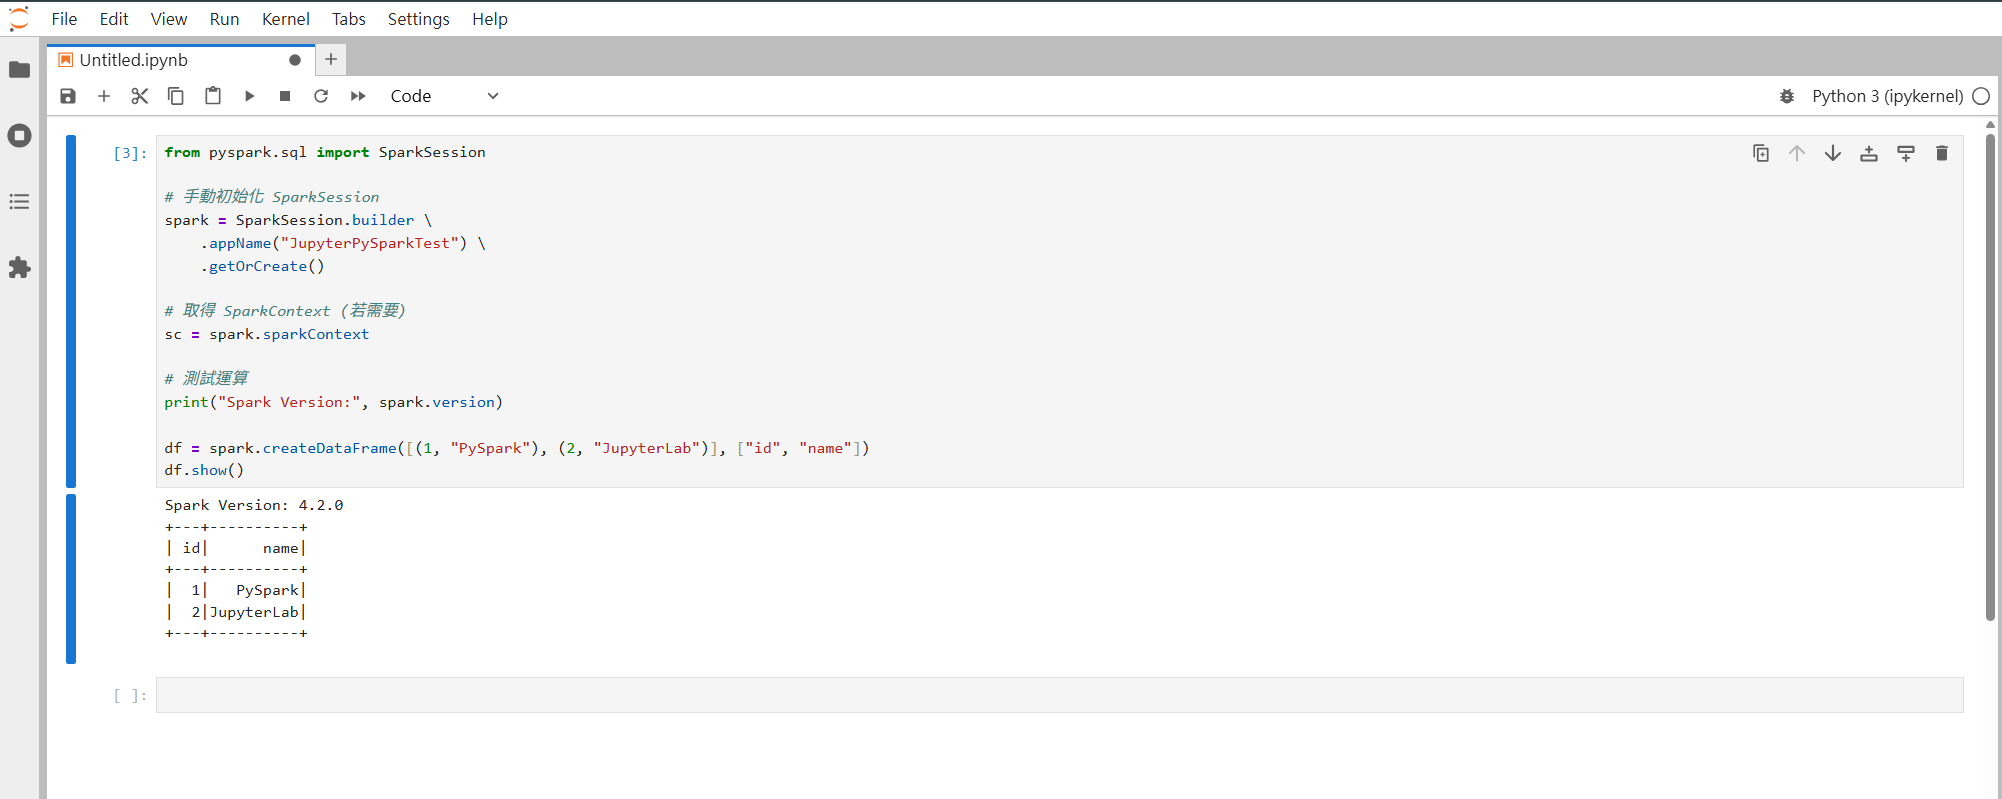
Run a test snippet in Jupyter-Lab and check the output
Run the following code — if you get output similar to the screenshot below, the installation succeeded and everything’s working:
|
|
Closing Thoughts
Congratulations — you’ve extended your Spark environment into something much closer to a real-world development setup. From here on, you can write and debug your logic directly in Jupyter, which is noticeably more interactive and efficient than working purely from a terminal, especially during data exploration and step-by-step validation.